

Meta Description:
Planning a siding upgrade? Learn the full siding installation process—from preparation to cleanup—and discover what to expect from professionals and common DIY mistakes to avoid.
Introduction
Installing new siding is one of the most effective ways to transform your home’s exterior, improve energy efficiency, and protect against the elements. Whether you’re hiring a contractor or considering a DIY project, understanding the siding installation process is key to ensuring a successful outcome.
This guide walks you through each phase—from preparation to cleanup—while highlighting what homeowners can expect during a professional install and the most common DIY siding mistakes to avoid.
Why Siding Matters
Siding isn’t just for curb appeal—it acts as your home’s first line of defense. Quality siding:
- Shields your home from weather damage
- Helps maintain indoor temperatures
- Increases your property’s resale value
- Reduces long-term maintenance needs
Given its importance and cost, getting the installation process right is critical.
The Siding Installation Process: Step-by-Step
🔨 1. Preparation and Planning
Before any work begins, a thorough inspection and planning phase is essential.
- Material selection: Choose from vinyl, fiber cement, engineered wood, metal, or natural wood—each with unique pros, cons, and price points.
- Measurements: Accurate measurement of your home’s exterior ensures the correct amount of siding is ordered.
- Permits: Check with your local building department about necessary permits. A licensed contractor typically handles this for you.
🔧 2. Removing Old Siding
In most cases, the old siding is removed before new siding is installed.
- Inspection: Once the old siding is off, contractors inspect the sheathing and framing for damage or mold.
- Repairs: Any underlying structural damage or insulation issues are addressed before proceeding.
💡 Tip: Skipping the tear-off may save money upfront, but it could hide moisture or pest issues that cost more later.
🧰 3. Installing House Wrap or Insulation
To improve energy efficiency and moisture control, professionals install:
- House wrap or a vapor barrier
- Foam board or rigid insulation (optional but recommended in cold climates)
This layer acts as a second skin for your home, helping prevent leaks and drafts.
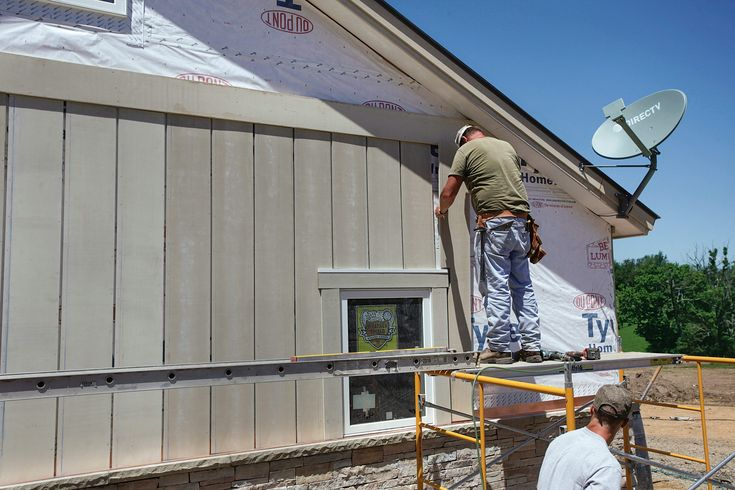
🪚 4. Siding Installation
Now the siding panels are cut and installed according to manufacturer guidelines.
- Starter strips and corner posts are installed first
- Siding is added from the bottom up
- Panels are fastened with nails, but not too tightly—allowing room for expansion
Experienced installers ensure each row is level and interlocks correctly. Depending on your home’s size and complexity, this phase can take several days.
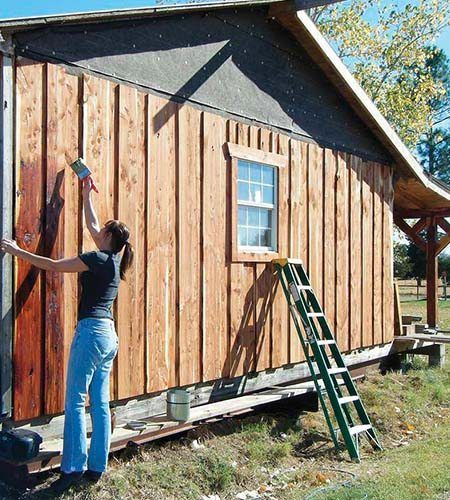
🧹 5. Trimming and Finishing Touches
Once siding is installed, the following are added:
- Soffits and fascia
- J-channel trim around windows and doors
- Sealant and caulking at critical joints
This step enhances both the functionality and aesthetics of your siding.
🧼 6. Cleanup and Final Inspection
Professional contractors will:
- Remove debris and leftover materials
- Perform a walk-through inspection with you
- Address any touch-ups or final fixes
You should also receive details about warranty coverage, recommended maintenance, and tips for prolonging the siding’s life.
What to Expect from a Professional Siding Install
A good contractor will:
- Provide a detailed estimate and timeline
- Communicate openly about delays or unexpected repairs
- Have proper licensing and insurance
- Offer a workmanship warranty
Pro Tip: Always read reviews and ask for references before hiring a siding company.
Common DIY Siding Mistakes to Avoid
If you’re considering installing siding yourself, be aware of these common pitfalls:
❌ 1. Skipping the Prep Work
Failing to remove old siding or inspect for damage can lead to long-term moisture issues or structural decay.
❌ 2. Improper Nailing
Nailing panels too tightly prevents expansion and contraction, leading to cracks or warping over time.
❌ 3. Uneven Installation
Without proper leveling tools and techniques, siding can appear crooked and reduce curb appeal.
❌ 4. Inadequate Flashing or Caulking
Poor sealing around windows, doors, or joints can cause leaks and reduce energy efficiency.
❌ 5. Ignoring Ventilation
For attic and roof health, make sure soffits and other ventilation features are not blocked or improperly installed.
Final Thoughts
Installing new siding is a major home improvement project—but with the right preparation and knowledge, it doesn’t have to be overwhelming. Whether you choose to hire a professional or tackle the job yourself, understanding the full siding installation process helps you avoid costly mistakes and achieve the best possible results.
By planning carefully, choosing the right materials, and working with qualified experts, your new siding will serve as a beautiful and protective barrier for years to come.
Tinggalkan Balasan